Monday, January 14, 2013

Death of a Lobster

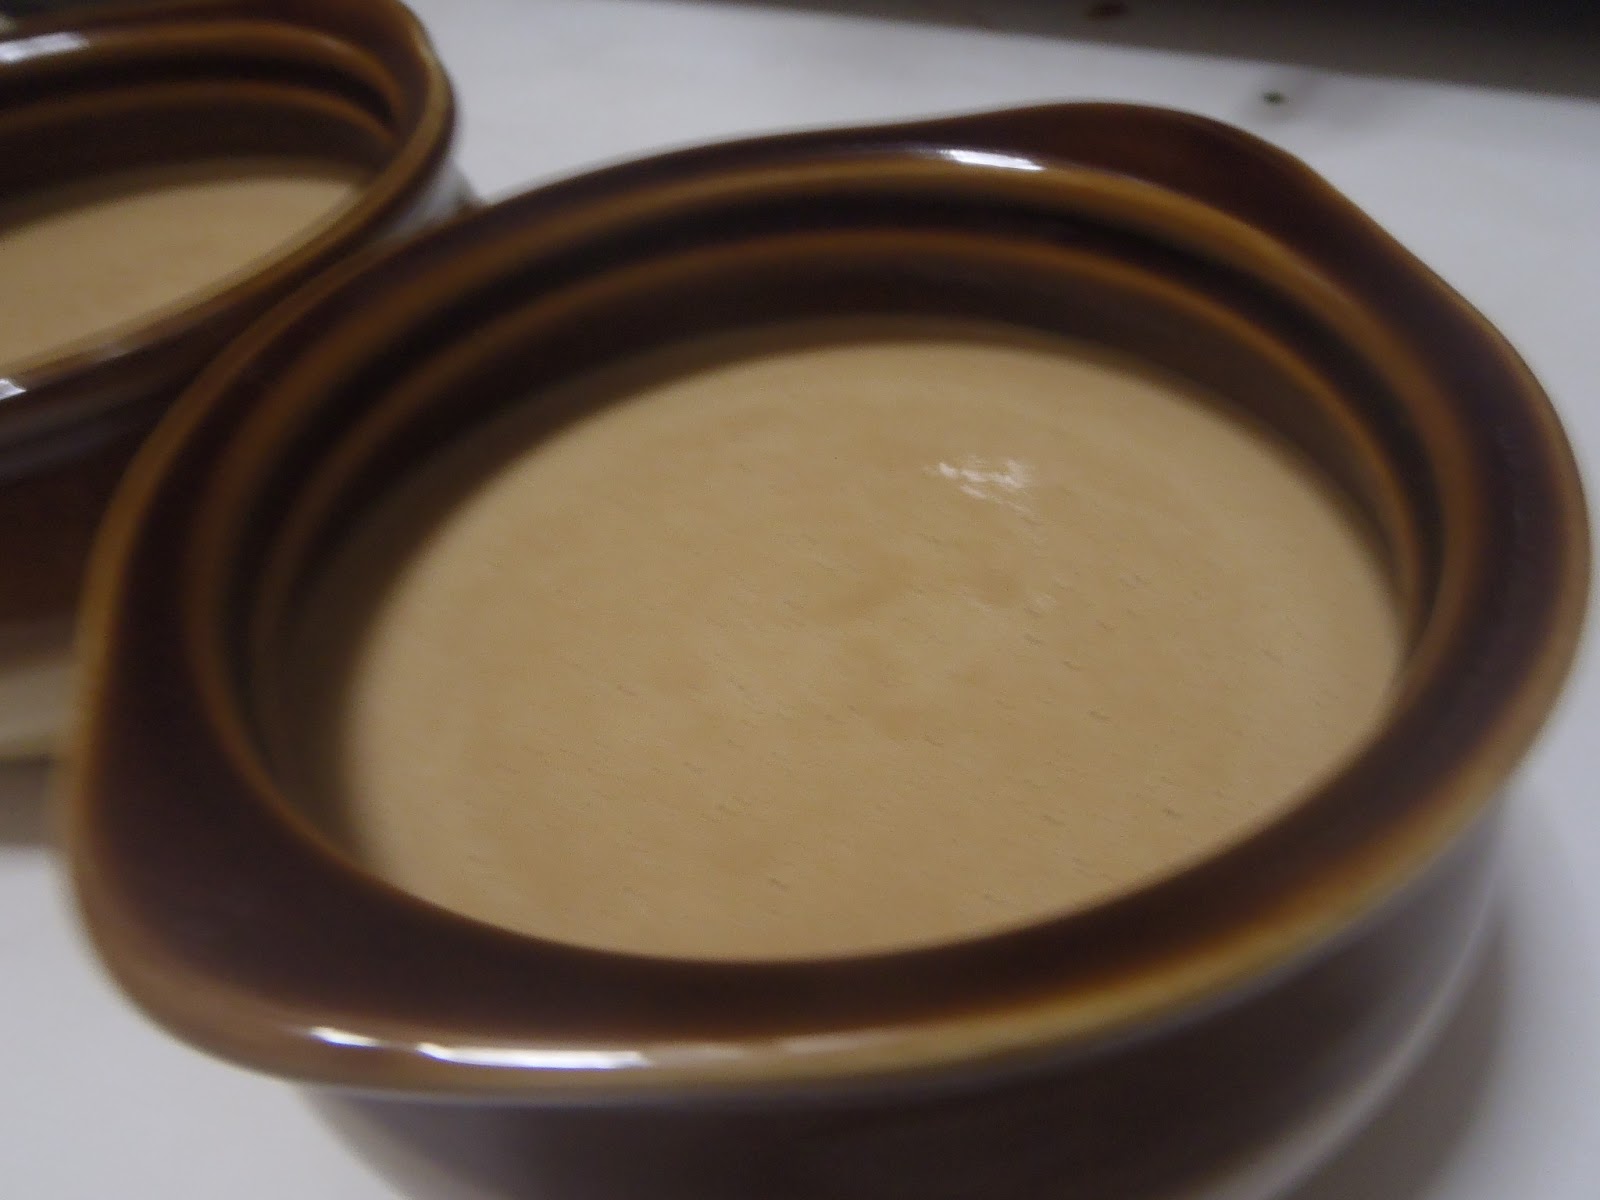
Every time I visit Benson, or he visits me, we usually take one day for a large, ambitious cooking project. On this most recent visit, we discovered that Fresh Direct (a grocery delivery service I occasionally use in NYC) will actually deliver live lobsters to your doorstep, in addition to whatever else you can buy. And they were on sale. And I had a free delivery coupon. With these facts in mind, we decided to embark on our first ever lobster project, and ordered two lobsters, who, sure enough, arrived alive and well on delivery. They didn't arrive in a tank of water or anything - I was actually surprised that they arrived wrapped up in the usual paper and plastic wrappings that things like salmon filets also arrive in. (Their claws WERE rubber-banded, however). But I guess lobsters are pretty sturdy. We proceeded to name them "Butch" and "Sundance," and sentenced them to a terrible and delicious fate.

Butch
Sundance

Since we were actually going to kill the lobsters ourselves, we wanted to make sure they were going to a worthy cause. So once again, we pulled out "The French Laundry Cookbook" for advice and recipes. For this meal, we chose TWO lobster recipes: one for the meat itself (butter poached lobster with leeks, pommes maxime, and beet essence), and another one for the bodies (creamy lobster broth). In addition, we made roast pears with a pear-butterscotch sauce from James Pattersons' wonderful 'Sauces' cookbook, for dessert (note: not seen in this blog post - this is my LOBSTER entry, and it's long enough as it is). This was truly an ALL DAY project, but one well worth it. The first recipe, the one with the lobster meat, was definitely the most complicated, and has several different components. You COULD eliminate some components to simplify, but it's pretty darn delicious all together, so I'd highly recommend trying it all together if you have the time. But read the full recipe first, because you can do a lot of the steps simultaneously, while various components are in the oven, or cooking down, or whatever.

The amazing finished product
Butter Poached Lobster with Leeks, Pommes Maxime, and Beet Essence
2 or 3 lobsters
1 large yukon gold potato
1 lb beets (or 1 cup beet juice)
1 large bunch of leeks (which will turn into 1.5 cups of leek rounds)
2 tbs tomato diamonds
2 tsp chives
1 tbs Brunoise* (*to make, you need leeks, carrots, and a turnip)
3 cups of butter* (*which makes 1/2 cup clarified butter and 2 cups Beurre Monte)
1/2 tsp red wine vinegar
~1/2 cup white vinegar/8 quarts of water
a few drops of lemon juice
kosher salt

Part 1: The Lobster. You can do this part early, and leave the lobster meat in the fridge until you are ready to cook it later (though bring it back to room temperature before you cook it). Unlike the traditional boiled lobster, here you don't fully cook the lobster in the shell - you leave it in the hot water only long enough to kill it and for the meat to pull away from the shell for easy removal. So, you need two large containers: one to initially boil the water and one which will hold the lobster and continue to cook it. Since my large pots are rather limited, I actually boiled the water in two separate smaller pots, than cooked the lobsters one at a time in my large pressure cooker pot (the largest pot I own). Fully cover the lobster with cold water in the pot it will be cooked in. Take that water, and put it in the another pot, and add 1/2 cup of white wine vinegar for every 8 quarts of water you used to cover the lobster. Bring this water to a boil. Pour this boiling water over your lobster. This kills the lobster. Now let it seep for 2 minutes (for a 1 1/4 lb lobster; 3 minutes for a 2 lb lobster). Remove the lobster from the hot water, but DON'T discard the water. Twist the claws off of the body and put them back in the hot water for 5 more minutes. During this time, detach the tail and carefully remove the tail meat by twisting off the tail fan thing and pushing the tail up and out (using kitchen shears helps). Cut the tail lengthwise, removing the sand vein. Once the claws are cooked, you remove those from the water as well, twisting off the knuckles. You can get the knuckle meat out as one big chunk of meat if you snip off the very top joint of each knuckle and cut away the shell. Do this. For the claws, you can rock the pincher back and forth, cracking it loose, then remove it straight off the claw, hopefully leaving the meat inside it still attached the the rest of the claw meat (I managed this on the second lobster, but not the first). You remove the rest of the meat from the shell by cracking the shell near the bottom on both sides, and pulling the shell bit off so the meat can come out the bottom. These steps results in a delicious plate of lobster meat, still for the most part uncooked. As for the body, you can pull off the back and remove the lungs, roe and the sack behind the head, and use the rest of the shells and body for soup, later. These can be frozen, or used promptly. You can use the water you boiled the lobster in for a base for your lobster broth, if you are making that as well. We did!
Delicious Lobster Meat
My mandoline
Part 2: Various vegetable preparation.  Beets, potatoes, and leeks all play important parts in this dish, and if you are slicing and dicing one vegetable, you may as well do them all at once. For this, it's extremely useful to have a device called a mandoline (seen right), which can slice vegetables extremely thinly. This not only makes slicing vegetables quicker and easier, but it also results in amazingly thin potato slices, which you really want for this recipe. I've included two pictures below showing HOW THIN we were able to get our potato - laying it out you could literally read through it, and see the inner structures of the potato - it really made me want to break out a microscope! Awesomeness.


So, the next step is to very finely slice your potato, as thin as you can make it. And unless you  either a) have beet juice, or b) have a juicer (we had neither), you also want to slice your 1 lb of beets as finely as you can, and then dice it nice and small, so they're easily blendable. While you are at it, take the leek rounds (the white and pale green part of the leek) and slice those as well, into strips (see picture in the leek section), until you have 1.5 cups of them.  Finally, prepare the vegetables for your brunoise. What is a brunoise, you ask? Good question, I had no idea either. It's a finely diced mixture of various vegetables - in this case, equal parts carrots, leek greens (the dark green part), and turnips - where all of the components are diced to less than 3 mm - a very fine dice indeed (again, see picture in the leek section). You only need 1 tbs total of the brunoise, but since it freezes well, you can make a full turnips worth and save the rest for later. So I diced up the entire turnip, with equal parts by weight of leek greens and carrots (diced by Benson) to match, and just made a LARGE batch of it, rather than a 1 tbs batch. In addition, you want to neatly slice your tomato into at least 2 tbs of diamonds: peel it, quarter it, remove the core until you just have the outside, which you then slice longwise into strips, then diagonally to make diamond shapes, which are rather pretty! So, that's your chopping - but keep all components separate for now!

Part 3: Pommes Maxime. You have your extremely fine slices of potatoes, so you are ready to make your fancy potato chip (which is kind of what this boils down to). Recall this recipe requires 3 cups of unsalted butter: You will now use about 3/4 cup of it to make 1/2 cup of clarified butter. This is pretty easy: just heat up the butter in a saucepan over low heat without stirring. It will separate. Skim off the top foamy layer of milk solids, leaving you with a clear, yellow butter beneath. That bit is the clarified butter, and it's what you use on the potatoes. Clarified butter can be heated up more without smoking since it doesn't have the milk solids in it. So, to make the pommes, take the potato sheets and dip them in butter, layering them on a silicon lined baking sheet either in one large sheet which you will cut up later, or into large round disks of potato. Sprinkle with salt, and bake in a preheated oven at 300F for 45-50 minutes, until they're brown and crisp. Keep an eye on them though, ours turned out a little toastier than we wanted - edible, but toasty. Mmmmm, toasty.


Straining the beet juice
The finished glaze.

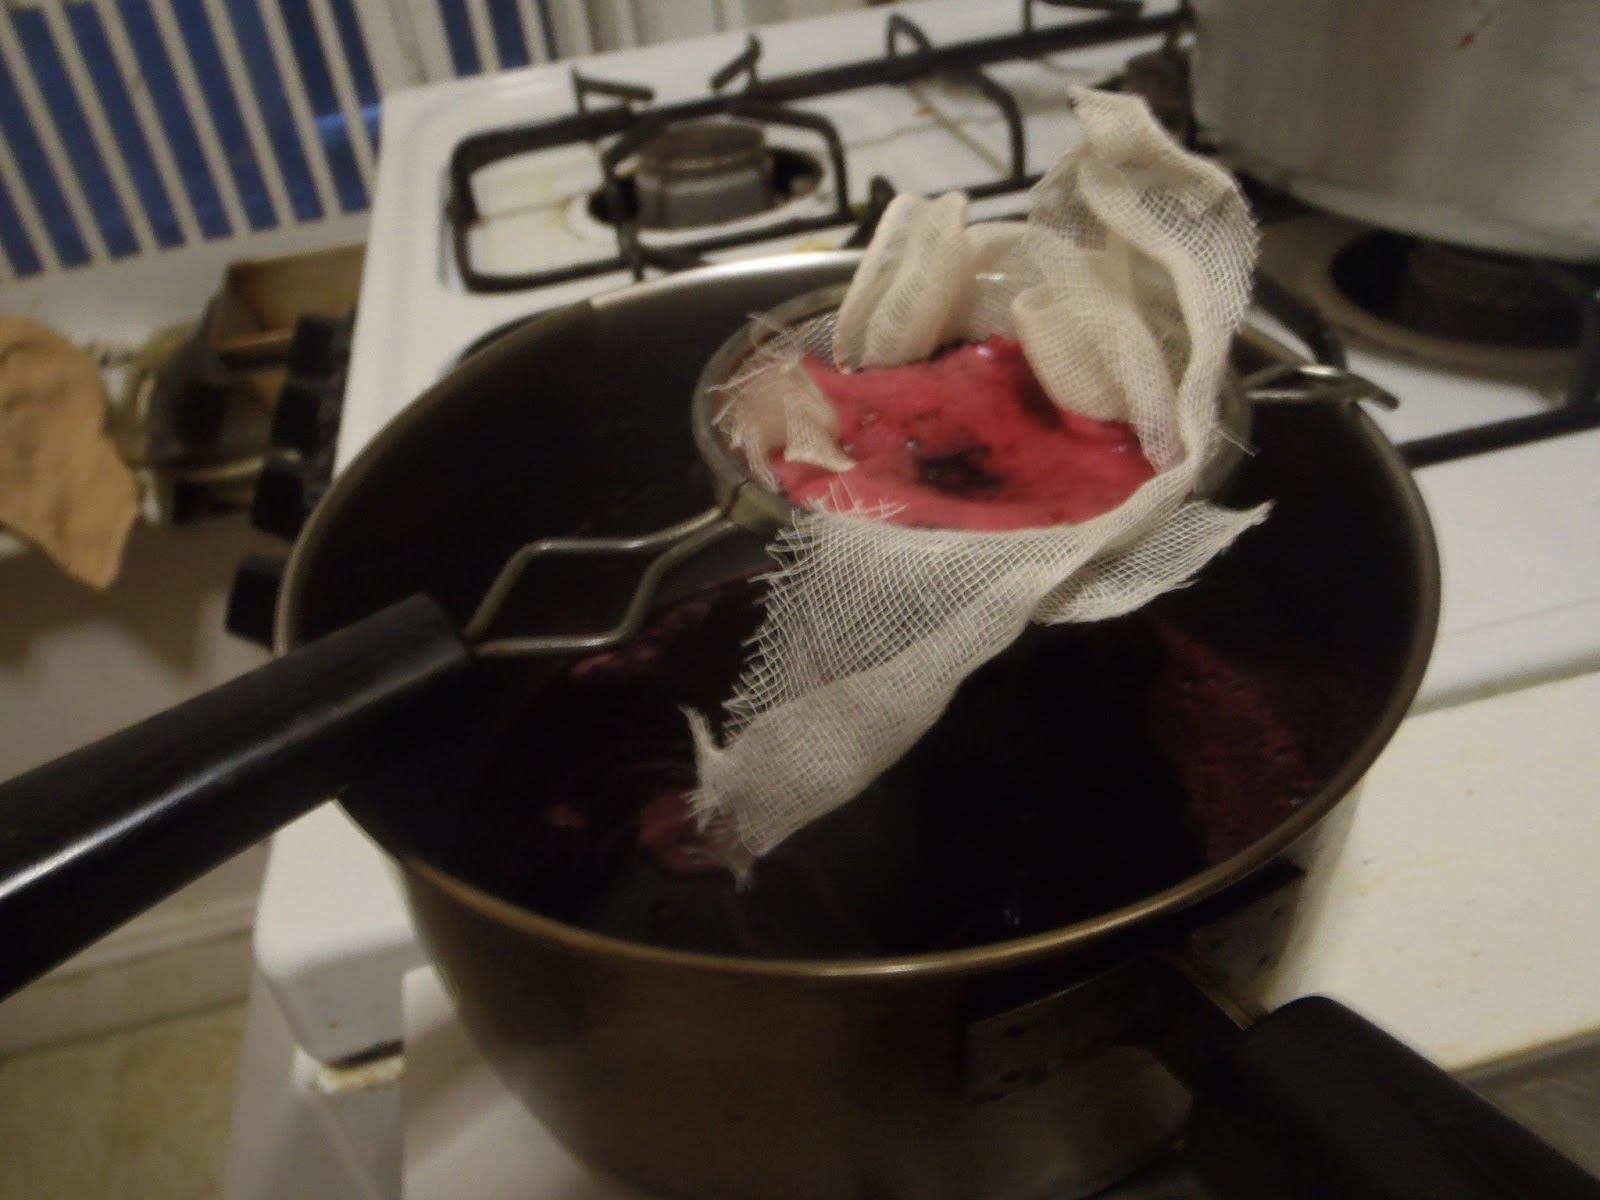
Part 4: Beet Essence. If you have a juicer or beet juice, you can skip this first bit. But if you DON'T, take your one lb of nicely sliced and diced beets and toss them into the blender. Add perhaps 3/4 cup of water and BLEND. Add more water if you can't get it to blend - what you are going for is a generous cup of the strongest beet water you can get. It's OK if it ends up a little extra watery - you'll be reducing this down to about 2-3 tbs, you just want all the beet essence you can get. So blend, blend, blend, then press it through a strainer and get all the liquid out you can. Then strain THAT through cheesecloth and a finer strainer (or a chinoise/tamis, neither of which I have. See my note on straining down in the Lobster Broth section.) Take this cup of now particulate-free beet juice, and reduce it slowly over low heat to 2-3 tbs of glaze - this will probably take 30-45 minutes, stirring occasionally, and skimming off any skuzz that may rise to the top. Is this worth it? Yes. Aside from the lobster itself, the beet essence turned into my favorite part of this dish, and if I had a juicer would happily make this beet juice on a regular basis for use in other dishes. Plate-licking good. There is one more step to finish this glaze, but that comes right before serving it.


Blanched leeks
Part 5: Leek mixture. You have all your veggie components sliced and diced at this point, and you are going to blanch each vegetable individually (leeks, carrots, turnip, and leek greens) until each part is soft. To blanch, boil some salted water, and prepare an ice bath (aka ice water). Taking each vegetable in turn (already sliced and/or diced), put the vegetable into the water until it is soft, but not mushy. You want them to be cooked, but still firm and full of color. Then immediately take the vegetable out with a strainer and drop it into the ice water until it is cool - this not only stops the veggie from cooking further, but helps it keep its nice color. I sometimes make string bean salad using this method.
Finished Brunoise

The leeks you should boil for a minute or two; for the diced veggies it shouldn't even take this long. Taste test them to be sure! Then once they've been iced, put them out on a paper towel and pat them dry(ish). Keep the leeks separate for now, but once the brunoise veggies are cooked, you can mix them up together into one big veggie mix. You can now mix the leeks with 1 tbs of the brunoise, the tomato diamonds, and 2 tsp of chives in a small saucepan. But before we can finish this part, we need to talk about butter.


BUTTER!!!!
Part 6: Butter. So now everything is almost ready to go: you just need to finish each of the components. To do this, you need BUTTER, or more specifically, Buerre Monte. So, I was amazed at this step, honestly, it was really cool and pretty simple to do. What you are doing is melting your butter in such a way that instead of separating out into the clear parts and the foamy parts, you end up with a thick butter liquid that still looks all creamy and buttery (see below). It's suprisingly easy, you just need a very little bit of water (about 1 tbs) and your butter. You need 2 cups of unsalted butter, cut into tbs chunks. In a medium saucepan, boil your 1 tbs of water, and ready your whisk.


finished buerre Monte
Reduce the heat to low, and start adding the chunks of butter bit by bit, whisking vigorously as you do so, as you emulsify your butter into the water. Once the process has started, you can just keep adding butter until you have the amount you need (in this case, about 2 cups) - you just need that 1 tbs to start. Keep the level of heat gentle and consistant, and keep whisking. You need to do this step right before you need to use the buerre monte, and keep it in a warm place until you do so, so that it doesn't break and keeps emulsified.


Part 7: Finishing Touches. Now that you have your buerre monte, you are ready for the finishing touches. Beet essence: bring the beet glaze to a simmer, then whisk in 3 tbs beurre monte, 1/2 tsp red wine vinegar, and a few drops of lemon juice to taste.  Leeks: heat the leeks, tomatos, chives, and brunoise with 1/4 cup plus 1 tbs of beurre monte until warm, then season with salt and white pepper.  Pomme Maxim: make sure they're in the desired shape, and reheat briefly in the oven until warm, 2-3 minutes at 300F. Lobster: The lobster should be at room temperature - place them in a wide saucepan and pour buerre monte over them to cover (about 1.5 cups, or the rest of the beurre monte). Put the saucepan over low heat and poach the lobster in the butter for 5 to 6 minutes, enough to heat through. The lobster will be cooked at this point, but it's cooked at such a low heat that the meat stays as soft and as tender as if it were raw. And once this is done, the poaching liquid (aka beurre monte) will have a nice sweet lobster flavor, which is completely reusable and amazing on toast, popcorn, and wherever else you might want to use butter. I have been happily using these leftovers!  Presentation:  On a small plate, put a spoonful of beet essence in the center. On this, place a generous tablespoon of the leek mixture. On this, artistically lay half a lobster tail, a claw, and the meat of one knuckle (aka, a quarter of a lobster). On top of THIS, place your pomme maxime chip at a jaunty angle. Enjoy!!!!

Finished dish, sans potato disk.

While our presentation was probably not as nice as it would be at the French Laundry restaurant itself, I thought that on the whole they turned out looking pretty good. But not as good as they tasted. Even if I don't do the whole rigamarole again, I will very happily poach my lobster in butter in the future, as that part was pretty easy (it was the rest of the preparations that took so much time!). The beet essence, again, was another amazing component I would also be happy to make on its own. The chip on top was tasty and crunchy, and pretty straight forward with the mandoline. And now that I have brunoise in the freezer, I'd eat the leeks again, too, but of the various parts, it was probably the least exciting and took the most work (all that dicing... I really need to remember to grab the food processor that is currently sitting in my parents basement for me).

As each lobster made 2 dishes worth, Benson and I were each able to have seconds, so that we had our whole lobster to ourselves. We probably could have eaten thirds if we'd made a third lobster to split! A complex dish, but truly, truly delicious. 

Searing the lobster shells/bodies
The creamy lobster broth, by contrast, was delicious AND simple to make, though we didn't finish it until the day after we had our lobster meal (we worked on the soup, but fridged the broth over night). We already had all the shells, legs, bodies, and whatnot from the lobster ready to go (remembering to remove all lungs, roe, and other stuff inside), leftover from the previous feast. So all we really had to do was roast the shells briefly in a pan (to make sure they were nice and red), then toss them in a pot with water and various extra ingredients and keep reducing the broth. The recipe called for 3 lobster bodies, but we had 2, so we just cut down the liquids by a third and kept the rest basically the same. The results were AMAZINGLY delicious, but also extremely rich. We got two small bowls of broth out of this... and neither Benson nor I could finish our bowls completely. It was simply... too rich, too much flavor, and our tastebuds simply got fatigued eating too much of it at a time. So we saved the second half of it for the next day and enjoyed it all over again. So if you make this, keep it mind it's definitely best in small portions - if I made it for a group I'd probably make about a shot glass per person - that would be enough to leave you wanting more, but not overwhelm you. (Incidentally, that seems to be the philosophy in general of food from the French Laundry - give you lots of small servings of amazing food, and leave you wanting more. In the case of the lobster itself, we were happy to eat more anyway, since we had it. In the case of the broth, a little bit went a LONG way). Anyway, here is the recipe for the broth - a definite must if you ever have lobster bodies and shells lying around - I'll definitely be making it again!

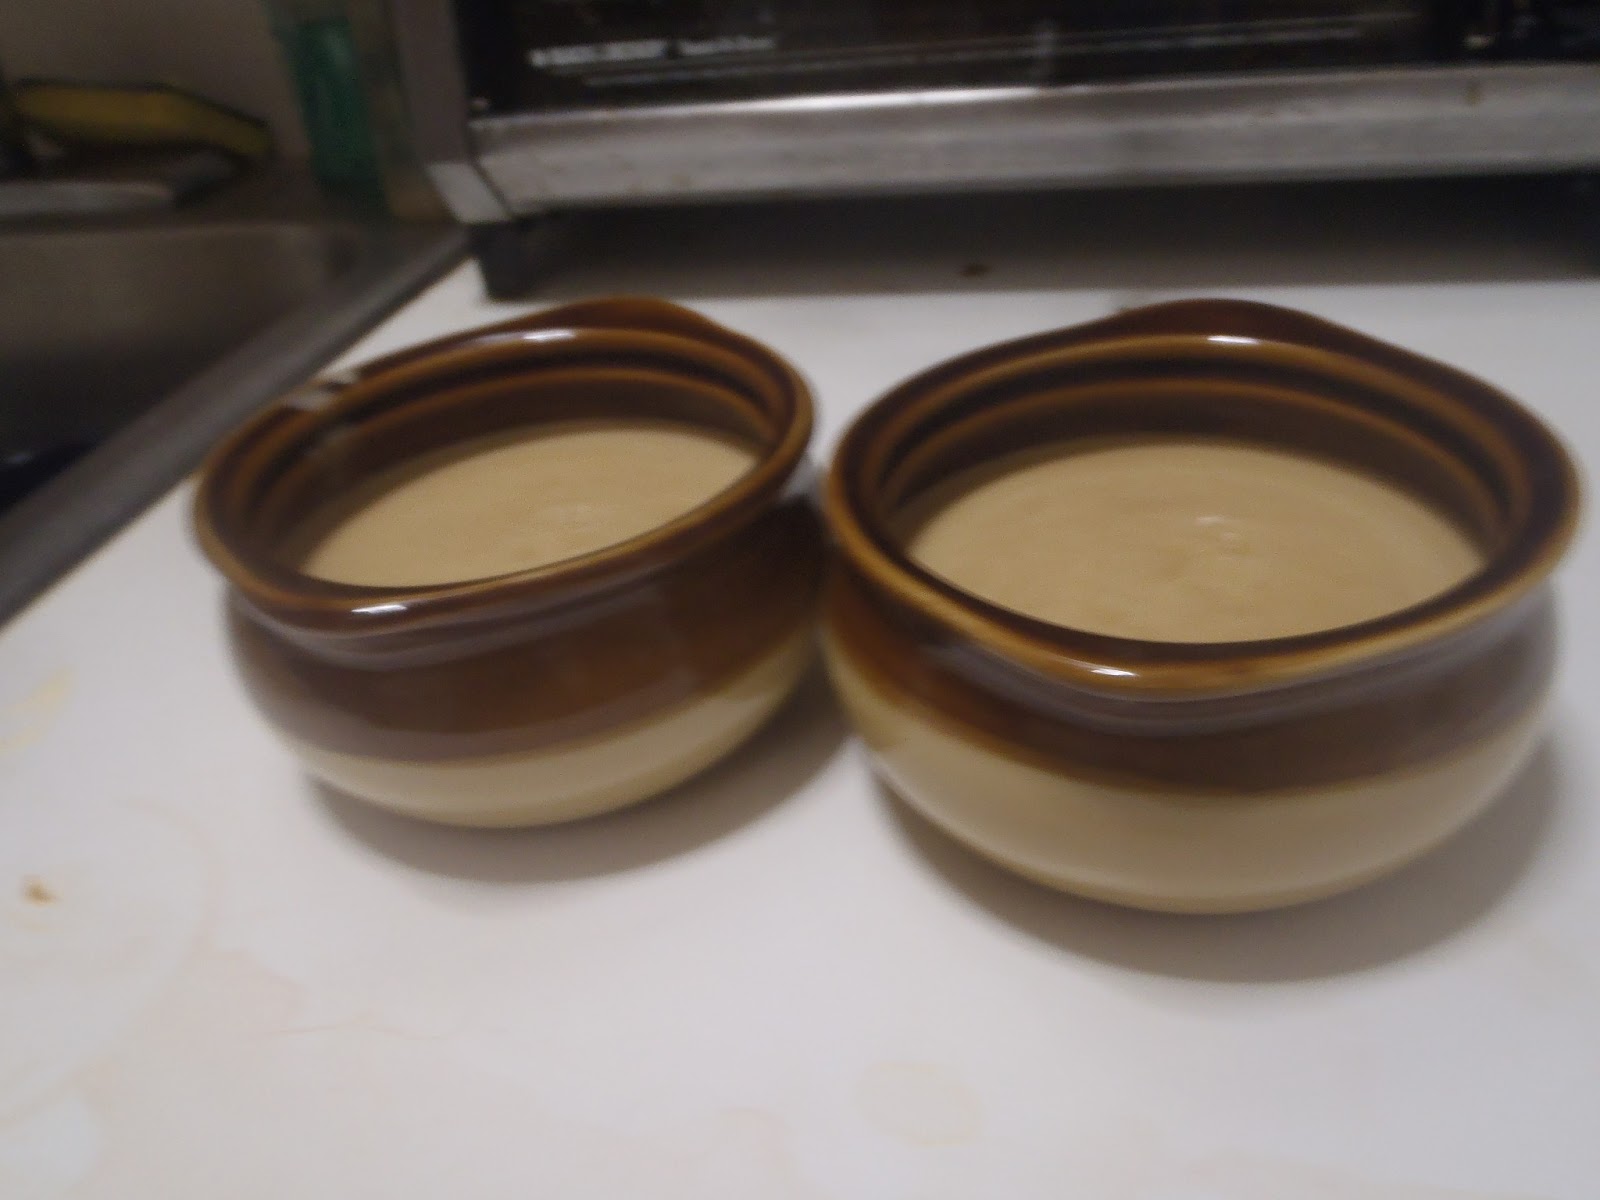
The amazing, rich, frothy, finished broth


Creamy Lobster Broth
1/4 cup canola oil
3 lobster bodies  (we used 2)
1.5 cups chopped tomatos
1/2 cup chopped carrots
1 bunch tarragon (1/2 oz)
1 cups heavy cream (we used 2/3 cups)


Making the Soup base

Take your lobster bodies and sear them with the oil over medium to high heat for a couple minutes, until they are well and truly red. Toss them in a pot, add the tomatos, carrots, and tarragon, and cover everything with water (you don't need to add salt). Bring to a boil, then let simmer for an hour - if any skuzz or impurities rise to the top, you can skim those off. This process doesn't require much attention. Once you've done this, strain the stock into another pot, smashing the lobster bodies to make sure all the liquid comes out.


Stock
You want to really strain the soup here and make sure there is no lobster shells, impurities, or little particulates. One of the things that Benson and I have learned from The French Laundry Cookbook is that straining your soups, sauces, and liquids increases the quality of your finished dish a LOT more than you might expect. There is even a page long entry in the cookbook titled "When in Doubt, Strain" - apparently the restaurant routinely puts sauces and stocks through an increasingly fine series of strainers 4 or 5 times before anything hits the table. So we ran the entirety of the broth through a tea strainer and cheese cloth, because we don't have a fine mesh chinois or tamis (a note to any readers looking for present ideas!). We have strainers larger than the tea one, but they're not nearly as fine, so we used those first, then moved on to the tea one. This took a while, but we have learned from past experience that it is worth it, so STRAIN your soup!

Adding cream
Next, take your now-particulate-free liquid and put it in a pot. You will now reduce this liquid (which is probably about a gallon of stock which doesn't taste particularly flavorful) to 2 cups (1.5 for us, since we started with fewer lobster bodies) - this takes a while, but again doesn't require much attention. At that point, the flavor is extremely concentrated, and, after straining it once more, we add one cup (2/3 cups for two lobster) of cream! Are we done? Of course not! Reduce this sucker down until it is once again 2 (1.5) cups of concentrated lobster goodness. This time you DO need to pay attention, because cream and heat can equal burning, so stir.

At this point, you take the broth, strain it one more time, just for fun, and put it in the refrigerator for several hours, to chill (or up to three days, according to the book). You want to do this so the flavor melds nicely - we left it overnight and that worked fine. Once you are ready to eat it, you put the cold broth into a saucepan and heat it on medium, whisking vigorously as you do so. You want it to froth up significantly, it seemed like it practically doubled in volume (though I didn't do a strict measurement of that). So once it's hot and frothy, you can serve it. In small, delicious portions. It is truly a delicious and surprisingly easy soup (and would have been easier if we had a LARGE fine mesh strainer, rather than a tiny tea strainer).
Soooooo goooooooood.

So the lobster resulted in two amazing meals - three, if you count the second lunch we had soup for. And I would definitely order live lobster again - while we did do a more complicated version of lobster, I'd be more than willing to try just doing a straight up boiled lobster, as well, if they were for a reasonable price and I didn't want to go too complicated. But I'd also very happily butter poach it again, since, if you ignore the extra veggies and sauces, that in of itself is amazing (and leaves you with leftover lobster butter - amazing on toast!). And when I do get lobster again, I will never ever throw out the shells. Even if I don't have time, I could just freeze them and make the broth some other time. Totally worth it!

Thursday, January 10, 2013

What I did on my Winter Vacation


After New Years, Benson and I went on a 8-night cruise with two friends from undergrad, Abe and Zahava (Benson's college roommate and one of mine, who are now married to each other). They had gone on a cruise for their honeymoon this past fall (they were married last July) and enjoyed it so much they wanted to go on another one, and invited us to join. Since Benson and I are both grad students, we can basically set our own schedules as far as when we take vacations, limited only by our own 'grad student guilt' to draw us back to work, writing papers and doing research. So, we got back this morning from our lovely cruise to Florida and the Bahamas.

Giant Chess!
Benson and I have been on one cruise before, the year between our graduation from undergrad and my first year of graduate school. Note that while Benson went directly from one to the other, I in fact took a 'gap year' in which I did much traveling - though I can talk about THAT in another post. That cruise was on Norwegian Cruise Lines on the Norwegian Pearl, and was the first cruise ever for either one of us, and was lots of fun. So when A&Z invited us for this one, on the Carnival Miracle, we thought it would be a lot of fun. Since this cruise left from New York, it was also a lot easier to deal with (compared to the Norwegian one which left from Fort Lauterdale, Florida). Benson still had to fly in from California, of course, but he would have had to do that anyway to visit. Naturally, the first few sea days were a bit chillier than they would have been leaving from Florida, but there was plenty on board to do on the ship, especially with a pair of friends who enjoy playing board games and card games as much as Benson and I do, if not more. There was mini-golf, pools and water slides, giant chess, various shows, trivia, cheesy dance lessons, and comedy routines; plus between us we brought the game 'Settlers of Catan', poker cards, pinocle cards, 'Magic the Gathering' cards, mahjong cards, and last but not least, '1000 blank white cards.' If you have never heard of this last game, it's OK - you don't buy these. You literally get a blank stack of index cards and make up your own game, draw your own cards, and watch how it develops over time, with the goal to just enjoy yourselves and have the most fun you can (if you actually want instructions, Google it). My closest group of friends in undergrad played this game throughout college, and by the end we had well over 1000 blank white cards (which were no longer blank, of course!). Abe has tried to widdle down the deck a bit to something more portable, since he's in charge of our now enormous deck. Its a good game for a large group of friends with lots of in-jokes and people of various drawing ability.
The Rocket Garden at Kennedy Space Center
So yes, there were plenty of things to do. In addition, we had three port days: Fort Canavral (Florida), Nassau (the Bahamas), and Freeport (the Bahamas). We didn't book any of the over-priced official ship excursions. For the first port, we took a shuttle to the Kennedy Space Center and bought our own tickets (which, including the cab, was literally half the price of the excursion which did the same thing, only with a large group). This was a lot of fun. Obviously, I like space things. The various exhibits focused more on the rockets, people, and general history of the shuttle and space program than the science behind it or gleaned from it, but it was really cool seeing everything up close. Alas, since the shuttle program has ended (SEND MORE FUNDING TO NASA), we couldn't watch any shuttle launches or anything, and as it was a foggy day we couldn't get a very clear view of the launch site, but there was a fun motion simulator ride which simulated being on a shuttle launch. Somehow I don't think we actually felt 3g's, however! But it was a really fun day.

The other two days were in the Bahamas, so we pretty much just spent them on the beach, in the ocean, and walking around town a bit. Zahava's a big swimmer (as in, she is on a swim team and does competitions) and lent Benson and I some goggles so we could all look under the lovely, clear Bahamas water at what was underneath. Mostly sand and seaweed, but we did see a few urchins, conch shells, and tiny silver fish! So we swam, lay in the sun, played cards on the beach, and walked around a bit (including having some delicious fish fry and conch salad) for the better part of two days.

Zahava and Abe, swimming in the Bahamas
However, the main thing that you do on a cruise line is eat. So Comedy Brunch with delicious eggs benedict and other goodies, with a different comedian most days, then lunch at an all-you-can-eat buffet (with ice cream machines), then afternoon tea with various desserts and snackables, then a late dinner at 8:15 (we got the late dining option) where you can order as many appetizers, entrees, and desserts as you can desire. The result of this last meal was me eating THREE lobster tails (along with some appetizers and vegetable sides) one night, simply because I could keep ordering them. Benson also ate three, and Abe was the champion eating FOUR. Similarly, one could order more than one steak, more than one shrimp cocktail, etc etc etc. Other dining highlights included frog legs, prime rib, souffle, chateaubriand, various shrimp dishes, beef carpaccio, and french onion soup. So we ate pretty well, too!

Formal Night: Benson and I
I also really enjoyed the formal nights that Carnival has: for longer cruises, on two nights you are supposed to bring 'formal' clothing to dress up really nice. So I brought my two bridesmaid dresses from this past year to wear - it was nice to have an excuse to wear them again, honestly - how often do you dress to that level of formality? Plus it is always nice to see Benson in a suit - honestly, most people look great in formal clothing, in fact, so just looking around the ship at everyone was kind of cool. On the first formal night, since I was feeling fancy, I decided to try out the ships casino, but was quite unhappy to discover that, although they had penny and quarter slots (which are about my price range for gambling), you couldn't actually PHYSICALLY stick coins into them. You had to make an account and stick your little sailing card into the machines, and any winnings or losing were automatically added or deducted to your card. This is NO FUN.

When I gamble, I go into it like I go into an arcade (I actually tend to enjoy myself more in arcades than casinos, honestly - I grew up going to arcades every summer on the Jersey shore in Wildwood!). I expect to lose any money I put forth, with the goal of enjoying myself for a bit of time and getting perhaps a little of the lost money back. But I consider it lost when I stick it in the machine (or whatever), and putting the coin in the slot, or whatever, and hearing the jangling of coins falling down is one of the pleasures of gambling. Seeing a little number balance go up and down on a screen? Not so much fun. The only game on the cruise that you could put coins into was one of those "quarter fall" games, with little pushers which maybe push quarters over the edge. So I played that for a little while until I ran out of quarters. But besides losing perhaps $3 of quarters, I otherwise didn't gamble. And if they'd had had coins operated machines, I would have. Their loss! I gambled far more on the senior trip in college at Foxwoods, when we went to a casino and I could actually put physical money down. THAT trip was great - and I actually won about $30 on poker, which I wasn't expecting. I had gone into it with the goal of losing perhaps no more than $30 anyway. However, the next week was the Belmont stakes, and, when I went with my friend Erica, I blew all $30 on various horses that didn't win (at $5 per horse - isn't my gambling crazy excessive?). So it evens out!  But I had a lot of fun both times, is the point.

Carnival Cruise ship
All in all, it was a very enjoyable cruise. Comparing it to the Norwegian Cruise Line, I tend to think Norwegian had better shows and activities on board, but there was plenty to do on Carnival and I'd be happy to go on that line again. The food on both cruises were pretty good, Norwegian had a different style for dinner, and which is preferable is a matter of choice. On Carnival, there was always all-you-can-eat-buffet open most of the time, with certain sections always open (the pizza, for example), plus a main dining hall you had a standing reservation for, with lots of changing menu options each night. On Norwegian, you also had a similar set-up with the buffet, but instead of a main restaurant, instead you had several different restaurants you could set up reservations for (all included, except a few that had, say, a $10 surcharge). Each restaurant also had changing menus, but the restaurants were themed (Italian, American, Steak, French, etc). So you had more overall variety and choice in what you ate, but couldn't try everything. I think I prefer Norwegian's set up in general, though there were nights you couldn't get reservations at the place you wanted at the time you wanted, so Carnivals standing reservations system did work well. The Comedy Brunches on Carnival were also a win. So, it depends what you want, I think. Overall, I wouldn't hesitate to recommend either cruise line.

Monday, December 31, 2012

Well loved books: The Vorkosigan Saga

As I stated in my last post, for Christmas I received an iPad mini from my Uncle Bob. Actually, in the note he sent with the iPad, he said he sent it to me for "Winterfair" - a reference to my favorite book series, one which he introduced to me to years ago: the Vorkosigan Saga by Lois McMaster Bujold. So naturally, one of the first things I want to do when receiving a bookreader (or something I'll primarily use as a bookreader) is load all my favorite books onto it. So the series of Vorkosigan books were the first ones I loaded onto the iPad. Now, I own hard copies of all of these books (in fact, I own pretty much every book that Bujold has written, either alone or in a compilation). However, due to what I think is pretty good marketing savvy on her - or her publishers - part, I also own all the e-books for this series as well, for the various omnibuses. One of the latest books in the series, Cryoburn, came with a disk which included ALL the Vorksigan e-books. It also included a note that basically boils down to this: "We want you to enjoy these books so that you will buy them. We want you to recommend these to your friends, and lend them to your friends, so that THEY will buy them. Go nuts." So, basically, I can hook up my friends and family with this series extremely easily, and without misgivings; and in exchange maybe I'll hook someone else on the series and they, too, will go out and buy all of her books.

I'm not JUST going to use the iPad mini as a book reader, of course; I've already downloaded a number  useful applications for myself, in addition to the iBook and the Kindle apps. For example, on the astronomy front, I've got the fantastic app Star Walk, which allows you to point your screen in any direction and see exactly what stars, planets, and constellations are up. I've also got a number of travel/map apps, including Exit Strategy, which gives you not only subway and bus maps of NYC, but also tells you WHERE TO STAND and what car to get into for the subway, depending on what stop you get off at. So you can get in the car which will be right by the exit or the transfer point! And of course, plenty of games, like Bastion (AMAZING game, though better on the computer than the iPad, buy the computer game first and the app second), Mahjong (REAL mahjong, not matching mahjong), various puzzles, and so on and so fifth. But I suspect the bulk of time I spend using this device will be reading books.


Anyways, my mother also got a book reader for Christmas, a Kindle, and she's very excited by this, since it will make it a lot easier for her to read in general and carry books around with her. She's been vaguely interested in trying the Vorkosigan books for some time, since she knows I love them, but it's been getting difficult for her to hold heavy books and turn pages. So last week, while she and my dad were up in NYC for a day after Christmas, I loaded all of of my Vorkosigan ebooks onto her Kindle, as well! And because I have strong opinions on this series, I wrote up a bit of background and description about it for her, as well as a recommendation of where to start, etc. And then, of course, I decided I wanted to expand on it even further, for a general audience, and thus, this blog post was born.

The Vorkosigan Saga is a series of science fiction books, taking place perhaps 1000 years in the future or so. However, the bulk of the stories are more about the people than the technology - or, if technology is an issue, it's more about how those technologies affect people and planets. For example, one futuristic piece of technology is the 'uterine replicator' - basically, allows people to skip the whole "being pregnant" thing, and just directly cook up your kid in the lab. As a bonus, you can therefore also make sure said kid is free of genetic defects, or choose the gender, or whatever. It also makes bio-engineering a lot more feasible. The planet Barrayer (from which Miles, the protagonist, hails) in fact has a bit of a problem with gender statistics, since when gender selecting came about, everyone started having lots of boys. Another of the books (Ethan of Athos) is about a man from a planet which doesn't have any women at all, since they aren't really necessary to the process anymore, except for the preliminary genetic material. The book Cryoburn looks more into cryogenics - freezing people when they're near death in hopes that a cure will come along eventually to extend their live. But again, its more about the people involved than the technology itself, and people remain people no matter what technology is available.

The bulk of these books focus on Miles Vorkosigan, the crippled heir of an extremely politically important aristocratic family on the planet Barrayer. Barrayer is very militarized, and historically has treated those who are physically different horrendously. However, Miles is extremely intelligent (and a bit hyper), and has an extreme need to prove himself. Over the course of the books, he becomes a successful mercenary commander which is in the employ of his government, running secret missions around the Nexus (the various planetary systems which make up the Vorkosigan universe) which the government doesn't want traced back to them. However, this means that the bulk of his achievements are classified. Which means back on Barrayer, he's largely seen as having some token military job because of nepotism. The books follow him throughout is life, from starting out in Military school (Young Miles) to his later life - the last book chronologically occurs when he's in his late 30s (Cryoburn). Some of the books are from other perspectives: Cordelia's Honor is from the perspective of his mother, for example, before Miles is born.

The books have been published both individually and in omnibuses - in general, I have the omnibuses of the books, and that's the way that all the e-books are collected as well. Therefore, in my overview below, I've listed the omnibuses in the order such that the bulk of the stories are in internal chronological order. However, this is not the published order  - Bujold wrote them a bit scattered over the timeline, though they're actually QUITE internally consistant! In general, you don't really NEED to read them chronologically, since the earliest books aren't required for understanding, and each book stands pretty well on its own. I would read the books in each omnibus in the general order presented, however. For the new reader, I'd say that once you've read a couple which sound interesting to you, then to go back and read them chronologically.


Personally, if you want to see if you are interested in the series, I would recommend starting with the short story The Mountains of Morning (in Young Miles). This will give you some perspective on the culture of Barrayar, and why Miles being damaged is such a cultural problem for him. I would also recommend Cetegania (in Miles, Mystery and Meyhem) as a good place to start, it gives an idea of what Miles' personality is like - plus, it's a nice little mystery. This was, in fact, the first book that I read in the Vorkosigan series! The other two books in the omnibus with Cetegania (Miles, Mystery and Meyhem) are also fun and give you a good picture of the Nexus and Mile's mercenaries. From there on, reading in chronological order is generally best, but not strictly required. You SHOULD read each omnibus in the order presented.

BUT.  

This series is basically broken in half - before and after the book Memory. You should read all the Miles books before Memory before you read Memory. You should read all the books AFTER Memory after you read Memory

Additionally, the 6th omnibus (Miles, Mutants, and Microbes) contains a story (Falling Free) which takes place, chronologically, 200 years before any of the other stories in the book. Read it whenever you like, it's a nice story, but largely irrelevant to the story-at-large. It also contains a repeat story (Labyrinth), which chronologically belongs in the first omnibus in which it's listed (Miles, Mystery and Meyhem). The final story is a new Miles story (Diplomatic Immunity), and belongs in the location it's listed, after Winterfaire Gifts and before Captain Vorpatril's Alliance!

You can find free snippets of Bujolds' various books and stories on her website, here. They used to have the story "Mountains of Mourning" up there for free, but that link currently seems to be broken.
Bujold has two other series, both fantasy instead of Science fiction: the Challion books and the Sharing Knife books. These are both ALSO very good, but Vorkosigan remains the top in my eyes. The Challion books is more action driven, whereas Sharing Knife is more of a romance. But both are fun fantasy books which I would also recommend. Worth taking a look at the snippets, at least!

So, here are the collections of Vorkosigan books and omnibuses, with brief descriptions:


0)  Cordelia's Honor (contains 2 books)

  • Shards of Honor: Miles' parents meet and fall in love during a war, on which they're on opposing sides.
  • Barrayer: Miles' mother is pregnant (with Miles), during a political upheaval.

1)  Young Miles  (contains 2 books and one short story):  the books here tend to be a bit more military based than some of the later books, with smuggling and internal politics. It is also partly a coming of age type thing as Miles finds a place for himself in his (very militarized) society as someone who is ... damaged.

  • The Warrior's Apprentice: The FIRST Miles book: Miles meets the mercenaries
  • Mountains of Morning (short): A short murder mystery, taking place in a local district on Barrayer
  • The Vor Game: Miles gets his first official mission and promptly gets into trouble.

2)  Miles, Mystery and Meyhem (contains 2 books and one short): these books are more mystery based, trying to figure out what's going on with various mysterious situations. These are the books I started off with, and all three are a LOT of fun.

  • Cetegania: Miles is on a diplomatic mission to another planet which has historically been an enemy of Barrayar.
  • Ethan of Athos: This book is NOT about Miles, but focuses instead on a doctor who gets mixed up with some business which Mile's mercenaries are also involved with. You won't see Miles, but you will see his second in command, Eli Quinn.
  • Labyrinth (short): Back to Miles, a short mission which spawns from the previous book, a rescue.

3)  Miles Errant (contains 2 books and one short): These books are great, but intense.

  • Borders of Infinity (Short): Miles infiltrates a POW camp.
  • Brother in Arms: Miles and his mercenaries take refuge on Earth after the fall out of the previous mission.
  • Mirror Dance: Various fallouts from previous books catches up with Miles and his family. 

4)  Memory (contains 1 book): "Miles hits 30. 30 hits back."
     This book really cuts the series in half. Before this and after this are two very separate stages in Miles life. Therefore, I would HIGHLY recommend reading books before this, before this, and the books after this, after this.
      
5)  Miles in Love  (contains 2 books and one short)

  • Komarr: Miles, in his new job, investigates an apparent accident on the planet of Komarr. And meets a woman. (more political/investigative, less romance)
  • A Civil Campaign: Miles attempts to court a lady while keeping this a secret from her. In addition, there is political fallout from the previous book's investigation. Romance! And lots of humor! 
  • Winterfaire Gifts (short): Miles' wedding (from the perspective of one of Mile's guards).

6*)  Miles, Mutants, and Microbes  (contains 2 shorts and one book)

  • Falling Free (short): This story takes place 200 years before the rest, and focuses on a race of bioengeneered people called "Quaddies." However, this is by no means required to understand the rest of the series, it will only really provide understanding to Diplomatic Immunity (also in omnibus 6), so I'd just recommend reading it before that!
  • Labyrinth (short): This is the same story as in Miles, Mystery and Meyhem - they just published it in this collection as well, since it also involves a Quaddie.
  • Diplomatic Immunity: Miles travels to Quaddie-space in order to sort out a tense situation with the Quaddies. This story chronologically follows "Winterfaire Gifts"

      
7)  Captain Vorpatril's Alliance (contains 1 book): Focusing on Miles' cousin Ivan, this is his romance. Ivan meets a damsel in distress, and partakes to help her. (Quite funny).

8)  Cryoburn (contains 1 book): Miles travels to the planet Kibou-daini, which specializes in cryogenics, and promptly stumbles into a number of tangled conspiracies.

Friday, December 28, 2012

Christmas Cookie Spectacular

Dad and I, decorating the tree
and stringing the lights
Christmas season is well upon us, and I, of course, headed home to Baltimore for the holidays. I spent several days, and had many productive hours decorating the tree, making cookies and Christmas Eve dinner, and generally spending quality time with family. Then on Christmas day, my parents and I headed up to New Jersey, to spend day with my grandfather. Since Poppop doesn't really do much cooking, (or like much cooking to be done in his kitchen) we all went out for dinner at a local diner - which are quite plentiful in New Jersey. Then today, it was back to NYC. Over the break, Benson will be visiting, and we'll be going on a cruise with him and two friends from college, which I'm looking very much forwards to!

Holiday traditions are always nice, and of course, the most classic one is that of the Christmas Cookie! While we do tend to vary exactly which cookies get made every year, we made two of our favorite standbys this season. The first is the  fantastically delicious and quite simple to make Hello Dolly Bars. I've also seen these listed elsewhere as Magic Cookie Bars, but the name "Hello Dolly" just has a bit more pizzazz. The second is the more traditional Chocolate Chip Cookie:  literally the standard recipe that you get off the bag of chocolate chips, though I do put in some notes about technique. But these are pretty classic, you HAVE to have chocolate chip cookies for Christmas, if nothing else!


Hello Dollys (aka Magic Cookie Bars)

1/2 cup butter
1.5 cups graham cracker crumbs  (8-ish graham crackers, crushed)
1 (14 oz) can of Eagle Brand Sweetened Condensed Milk
1 cup semi-sweet chocolate chips
1 (3.5 oz) can flacked coconut (or 1 1/3 cups of coconut)
1 cup chopped walnuts.


mmmm... toasty!
Preheat the oven to 350F. Melt the butter completely in a 13x9 baking dish. Make sure to tilt the pan so the butter is even over the bottom surface, then sprinkle the graham cracker crumbs over the butter evenly. Next, pour the milk over the surface (evenly).  Note that this is easier said than done: sweetened condensed milk is THICK, and I usually have to  spread out the last bits with a spatula, and tilt the pan back and forth a bit before it is even... and there are usually a few holes leftover. As long as they're small, this is fine. Follow with the rest of the layers (chocolate chips, then coconut, and finally the walnuts) - making sure each layer is nice and even, and that you don't neglect the edges of the pan. Press all of this down firmly so it's nicely packed. Bake for 25-30 minutes until the coconut is nice and toasty brown, and the chocolate chips are starting to get nice and gooey. Remove from the oven and let cool, then cut into bars. You can store these at room temperature. (Makes 24-36 bars, depending on how big you cut them). These are delicious, rich, and chocolatey, and absolutely one of my favorite cookies every year.


Next, onto the classic. Chocolate chip cookies are an absolute MUST for the Christmas season!


Nestle Tollhouse Chocolate Chip Cookies
2.25 cups white flour
1 tsp baking soda
1 tsp salt
1 cup (2 sticks) softened butter
3/4 cups white sugar
3/4 cups brown sugar
1 tsp vanilla extract
2 large eggs
2 cups chocolate chips
1 cup nuts (optional)


Softened butter, sugar, and vanilla!
For a nice creamy texture.
It is a good idea to put out your butter a couple hours in advance, so that it softens naturally and you don't have to microwave it to soften it and risk melting it altogether. You want SOFT butter, not melted butter, to get the batter texture right and for the best cookies (yes, how you put in the butter actually matters for the finished product!). So do this well in advance! This is a good plan for any cookies or cakes which require softened butter. Honestly, butter doesn't really need to be refrigerated as much as you might assume - while you don't want it in a super hot place, if you keep it out in a relatively cool area, you really won't have any problems. However, I still tend to stick it in the fridge, where it will last longer. But if I'm eating a lovely loaf of homemade bread, or something, I will occasionally leave out a half a stick of butter so that its soft and easily spreadable!

Sifty sift

Another note, for your dry ingredients: when making Christmas cookies, we (my father and I) ALWAYS sift the flour before adding it, and similarly, we ALWAYS sift the sugar. This avoids lumps in the batter! Admittedly, when making cookies on my own, I don't always do this. But Christmas cookies are worth the extra work!

Preheat oven to 375F. First, combine (sifted!) flour, baking soda, and salt in a small bowl and mix well. In a larger bowl, thoroughly mix the softened butter with the (sifted!) white sugar, (sifted!) brown sugar, and (not sifted, silly!) vanilla extract. To this, add eggs one at a time, beating well after each. Then gradually add the flour mixture to this. Do this SLOWLY, a bit at a time, so that it doesn't lump up, or get uneven, or whatnot. This part is probably the most strenuous - we always do it by hand, and it gets quite thick after a while. In fact, this can get to be a problem. Years back, my dad and I made an extremely large batch of cookies, a triple recipe or so. Dad did the bulk of the stirring at that time, though we switched off a little, and his arm got QUITE sore. In fact, the next day, his elbow still ached.   And the day after that, it STILL ached. In fact, Dad had what we dubbed "chocolate-chip-cookie-elbow" for several months following that Christmas. Since then, I've done the bulk of the stirring when we make cookies - and we haven't made quite so large a batch, either.

Chop chop chop!


Once you've mixed the dough, you can now add the chocolate chips! Mix well until they're evenly distributed.  You can then add nuts at this point, if you so desire. While my mother is a big fan of chocolate chip cookies with nuts, my father and I aren't such fans. Therefore, we always weigh out the cookie dough precisely and make 1/3 with nuts, and 2/3 without. This saves much family argument.


My dad, putting the last few cookies
onto the tray
Now, all that's left is to bake them before you eat all of the delicious cookie dough. That's always my temptation, the dough is as good as the cookies, I swear. In college, the campus convenience store sold pre-made cookie dough which you could buy with your meal plan. As such, there was often a thing of cookie dough in my dorm fridge, of which my roommate Zahava and I always ate a lot, and our other roommate, Dahlia, protested about it's presence as too much temptation (but she still ate a LITTLE bit anyway!). I have, in fact, at least on one occasion, made a half batch of this cookie dough and failed to get any actual cookies out of it. I'm generally not concerned about raw eggs and such, since the odds of getting ill from that are quite low.

But anyway,  make rounded tablespoons of dough and place them on an ungreased cookie sheet, with a bit of space between them, then bake for about 10 minutes, until they're nice and brown on the bottom. Then transfer the cookies either to cooling racks, or lay them out on the table on top of a brown paper bag (which you can cut up for this purpose as a makeshift cooling rack!). And there you have it! Delicious chocolate chip cookies. You can store them in cookie tins or whatever you have on hand. I will note that when I store a few chocolate chip cookies in a container with a few Hello Dollies,  the Hello Dollys actually keep the chocolate chip cookies softer than they would be otherwise, which is nice!

All in all, I had a wonderful Christmas. Key gifts include an iPad Mini, some very fine mittens, and, on the foodie front, a nice set of springform pans! So expect a cheesecake post at some point in the future.
Merry Christmas, and a Happy New Year!

Tuesday, December 18, 2012

The Astronomer's Day On

Me on Mauna Kea (HI), during an observing run last August.
Those aren't the telescopes I was working with - the
SMA is an array of 8 radio dishes, whereas these are all
optical telescopes near the top of the mountain!
As I said in my introductory post, I am an Astronomy PhD student, studying at Columbia University. While the main focus of this blog is what I do when NOT at work, astronomy is a very important part of my life. Last week, I had a thesis committee review: every six months (or so), the panel that will eventually be deciding if I get a PhD meets, and I give an overview of what I've been doing, and what I plan to do. This is all designed to keep my thesis ON TRACK, make sure I'm not floundering, and to give me advice on what they think I need to work on, or keep doing right. So, having just ruminated on my research, where it's going, and what my accomplishments are to prepare for this meeting, it seemed an appropriate time to introduce readers of this blog to my research.

In a word, I study novae. Novae can occur in binary systems where a compact star (most often a white dwarf) accretes mass from its companion. When enough matter builds up on the surface of the star and some critical mass is reached, it triggers a thermonuclear reaction which blows off material from the white dwarf as a shell of plasma. This material is quite hot and luminous, so naturally at this point you will see the star brighten - hence the name, "nova", which means "new star." Depending on the type of nova, this material will brighten and fade on the order of days to weeks to a few months - in the OPTICAL range. However, my research focuses on the RADIO light curves of novae, and how they evolve over time. In the radio regime, the time it takes for the lightcurve to rise and fall is usually on the order of months to years.

A lot of my work is based on the fact that different frequencies of light travel through plasma differently (like X-rays travel through your hand, making it possible to image bones, but you can't see through your hand in visible light). Therefore, if you look at the plasma ejected from a nova in two different frequencies, you'll get two separate brightnesses. So you can watch a nova in multiple frequencies and watch how it changes in each one, put it all together, and using some simple models and assumptions, make estimates about various properties of the ejecta (and thus the star and explosion as well). One of the things I really like about novae is that they occur on a time scale that we can NOTICE and KEEP TRACK OF. A new nova can go off at any time, and people all converge on it at once. You can clearly see the time evolution of these objects, and have a list of novae which are doing interesting things.

 But... sometimes the models don't quite work. Our assumptions are too broad, or there is some extra factor we overlook, or we get an answer which flies in the face of current nova theory. One of these issues is going to be the basis of my thesis: we're finding too much mass. Based on standard nova theory, we can estimate how much mass should be ejected in a nova shell. But when we do our model fits with observations, we seem to get masses over an order of magnitude (ie 10x) greater than what we expect. So is the problem with theory, or with our model fit assumptions? We've been making more and more detailed observations of novae, and we're still getting these large masses, even when taking in some additional factors in our model fit - because you can only stretch parameters so far and still keep your assumptions reasonable.

One of the assumptions we generally make in our models of novae is that the material ejected is spherically symmetric. Now, we KNOW that isn't true - nova ejecta is known to have clumps, or jets, or other asymmetries - but its a useful first-order approximation to make. So I'm also interested in jets and outflows in general, and what they imply about the system. Jets appear on multiple size scales in the universe: they can appear in outflowing systems from white dwarves to active galactic nuclei. So, in addition to novae, I have interest in other systems with varying brightness due to accretion, with outflows - like cataclysmic variables in general (where variation is due to accretion between two stars), and symbiotic stars (white dwarf/red giant binary system). I also have a fondness for neutron stars, though I don't really study them specifically at the moment. So really, binaries, jets, and compact stars in general hold my interest!

Some of the VLA telescopes
(in it's SMALLEST configuration)
I'm working with a collaborative group (the e-Nova project) looking at a number of different novae in radio, optical, and X-ray. The majority of our observations come from the Karl G. Jansky Very Large Array near Socorro, New Mexico.  This is an array of 27 individual antenna, working together as one (very large) radio telescope. I've been out there three times; however, these have generally been to learn how to do radio data reduction and analysis, not for observations themselves. When you get time on the VLA, you can input your operating instructions in the online system, and the operators out in New Mexico take care of the observing for you. The only observing I've done personally has been one trip out to MDM at Kitt Peak, AZ, two years ago, and one trip last August to the Sub Milli-meter Array (SMA) on Mauna Kea, Hawaii. The first of those trips was with a class on observational astronomy, where students got sent to the telescope (of which Columbia owns a share) to get experience with optical observing. The second, however, was directly related to my research: in order to obtain time on the SMA, you are required to send out an observer for a week to assist the local operators. So, when we wanted time for high-frequency radio observations of a few young novae, I got tapped to go. It was a pretty awesome experience... though sitting for a control room over a long night actually gets rather dull after a while.

Anyway, my collaboration has recently submitted two papers on which I'm a co-author. They are still undergoing the referee process, so they're not "published" yet and will undoubtedly change a bit before final publication, but they've been listed on the Astro-ph archives. I'm 9th and 10th author on these - it's a large collaboration - so I didn't actually do much of the writing, my contributions were more on the data side, as well as in editing and general discussion. But if you are interested in a bit more technical detail about what I've been working on, you can find those papers here.


Friday, December 14, 2012

"The Hobbit" Review: here there be spoilers!

WARNING: THIS POST IS FULL OF SPOILERS FOR "THE HOBBIT: AN UNEXPECTED JOURNEY"

When I was in the third grade, I received a beautifully illustrated copy of "the Hobbit" from a great aunt. It was probably my first exposure to an "adult" book - sure, it was a fantasy, and often thought of as a children's adventure book; but it had complex themes, characters had moral ambiguities, and not everyone was guaranteed to live through the tale. It was a wonderful book, and I still treasure my copy of it. When I was older, I went on to read, and also love, the Lord of the Rings books, like so many others do. And when the trilogy came out, I was enchanted once again. Sure, they left out some things; and played fast and loose with a couple plot threads; and added in a couple extra little plot lines here and there: but overall, those changes didn't change the fundamental elements of the story.

So, when I heard that Peter Jackson was making "the Hobbit" into a movie, I was thrilled! Another great book, so, sure, why couldn't it be a good movie as well? I was rather surprised to hear it was being split up into not two, but THREE movies, but still had high hopes. I expected, of course, that they would "pad" things out a bit (though I don't really see why movies have to be 2.5 hours long these days - nothing wrong with a perfectly solid, tight movie at 95 minutes or so!). But I can deal with a little padding if it's done well. So, when another person in my department suggested going to the midnight showing for the premiere, I lept at the chance. I happily reread the text of "the Hobbit," and for good measure, re-watched the extended editions of the LotR trilogy last weekend. You may guess where this is leading: unfortunately, when I left the theater, I was sadly disappointed.

It felt like they couldn't decide between making it an sweeping epic prequel to Lord of the Rings, or a comic action-adventure story. They removed dramatic tension, and put humor in places which are supposed to be scary and creepy. They added full subplots that were never seen in any part of the Hobbit, Lord of the Rings, Silmarillion, or the varying appendices.

One of the things I wasn't as wild about in the Lord of the Rings movies was the characterization of Gimli (son of Gloin), as a comic-relief type character. Dwarves are a proud old race - short and stout, to be sure, and they have their comic moments as well - but proud, dignified. "The Hobbit" has 13 dwarves. Thorin Oakenshield actually fits the proud dwarf thing very well, and it goes into his backstory quite a bit (and then some, but we'll get to that). However, despite the length of the film, unless a dwarf is directly interacting with Thorin, or they're fighting... you don't get much characterization of the other dwarves except as funny/silly in the background.

Now... as far as the story. They open the film describing the desolation of the town of Dale and the  way that the dwarves were thrown out of the mountain, then have a bit of a framing device with old Bilbo working on his book the day of the party (via the opening of LotR), with a cameo by Frodo. Not how I would have chosen to present it (over campfire or in a darkened room, like in the book!), but fine.  It shows the elves refusing to help, which explains why Thorin is so reluctant to go to them now. Fine.

But then it adds a whole subplot about how, when trying to take back the mines of Moria, Thorin faces a giant orc, who 1) swears to wipe out his family's line; 2) does so except for Thorin; 3) gets his arm chopped off by Thorin; and 4) is currently HUNTING for Thorin for revenge for the arm, and to fulfill his oath. He rides a giant albino warg. So... throughout the story, we get these random orcs popping up, hunting Thorin and the dwarves, and a great big climatic fight scene underneath the trees in which the dwarves are supposed to be hiding. The goblins under-the-mountain take the dwarves not to devour, but to deliver to this orc, who has placed a bounty on them. You remember the awesome portrayals of the Uruk-hai in LotR? They're ugly, they're nasty, they're primal, they are guttural. The Great Goblin, on the other hand is now a fat, comical figure with terrible dialogue and who doesn't SOUND goblin-y. I just am NOT frightened of this goblin - even the CGI is.. bleh! (A random aside: I found it amusing that they made sure that the line of ponies that the dwarves and Bilbo rode were NOT presumed eaten by the goblins - instead they were scared off in an earlier confrontation with the wargs.)

Similarly: Riddles in the Dark. Oh, I was so looking forward to seeing Gollum again. And this scene is GREAT for his character - he's creepy, scary, but still oddly pitiful in his isolation. At least... that's how it's written in the book. Here - they again exchanged tension for humor, unsuccessfully. I was SO disappointed by this scene, I just... ugh. No.

And finally, Bilbo himself. I realize this first movie was supposed to be about him finding his place in the group, and his footing, as he starts off living in his very comfortable hobbit life. However, the book has some hints early on about where his spirit and thirst for adventure originate, and he starts showing at least some talent pretty early on, in his skill moving through the forest silently and easily. He is NOT, however, used as a hostage by the trolls, causing them to all be easily captured. Nor does he repeatedly fall down cliffs and whatnot and keep needing help to that extent. Nor does he literally DECIDE TO TURN BACK and leave the party when things get rough. There is a big subplot in the film about Thorin doubting the skills of Bilbo, and as much as I love Martin Freeman, I was definitely doubting him myself - and not in a good "oh, character development" way. And the turnaround - Bilbo risking his life to tackle an orc off of Thorin - that's... not really what Bilbo's character is about, now, is it? He's NOT a hobbit of great deeds, and action, and fighting. He's the hobbit who will later give up his share of treasure in exchange for peace. He'll fight if he has to, and to save his friends, but that's not how he proves himself in this story - it's NOT the tale of how Bilbo Baggins becomes an action hero.

Not everything was bad, of course - honestly, I had fun watching the movie and will go and see the next two. Considering we all knew they'd be incorporating some things about Sauron (who is only referenced in the book as a 'necromancer in the south'), and adding Galadriel and expanding the role of Elrond a bit, in order to make it fit with Lord of the Rings more, I think they did that part quite well (ignoring the overly silly portrayal of the brown wizard Radagast, which was quite overdone). Ian McKellen was wonderful as Gandalf, and had some great stuff. Good fight scenes. I love Martin Freeman, he makes a very good Bilbo and also has some very good moments. The way that Bilbo sees the world when he has the ring on is also done just right - the right mix of what Frodo sees in the LotR movies, without the pressing eye of Sauron. The songs that they included, especially "Misty Mountain", were great. And it was, of course, lovely to look at (I saw it in 2D, not 3D high-res, but yes, gorgeous). But since I had such high expectations, these items got overshadowed when I watched the film through.

I think it comes down to one thing. "The Lord of the Rings" is so much story, that you have to cut it down to make three movies out of it; and when details get added, dropped, or changed, well, the bulk of those movies are still true enough to the books that it doesn't matter as much. "The Hobbit" is a very different tale, and it needs - and deserves - to be treated that way. Less complicated and fewer plot-threads, but a lot of heart running through that simple story. Telling it over three movies stretches it too thin, and the content you add to fill it up just... isn't Tolkien, and it's obvious.

Friday, December 7, 2012

When life gives you lemons... make limoncello!

Anyone who knows me well knows that I love
lemonade. You will seldom see my fridge free of lemonade during the summer; and if it is, it's because I just finished drinking a batch of it. My favorite brand is Simply Lemonade - they primarily are Simply Orange, with orange juice, but I think their lemonade is just spectacular, with just the right balance of sweet and sour. But of course, buying a $4 thing of lemonade every week seems a bit excessive, especially when it's extremely simple and easy to make lemonade on your own, and lemons are 3 for $1.


Homemade Lemonade:
9 c. water (ish)
1.5 cups sugar (ish)
5 lemons (or so) (~1 cup lemon juice)
honey, lime juice to taste


I have a 2.5 Quart pitcher, which I fill most of the way up with HOT water (doesn't have to be boiling, but you want the sugar to dissolve into it.) Honestly, I don't measure it out, but it's probably about 9 cups worth of water. Add a cup (or a cup and a half if you like it sweeter) of sugar and STIR. You want that sugar to dissolve fully. If it's not hot enough, you'll have to pour it into a pot and heat it up. This gives your lemonade a nice smooth taste. No graininess! For flavor, I like to add a dash of honey as well, gives it a nice richness.

Let your water cool a bit, then squeeze 5 lemons - switch in a lime or two as well, if you'd like a bit of variety - into the pitcher, and stir again. This should amount to about a cup of lemon juice, give or take, depending on the juiciness and size of the lemons. If you are serving for company, you might want to squeeze into a bowl first, sift out the seeds and the pulp, then pour it it. I like the pulp, so I just toss all the squeezings in and spit out the occasional seed when I drink the stuff. TASTE TASTE TASTE as you make it, to make sure the sweetness and tartness levels are right for YOU. If its not, add more lemon juice, lime juice, honey, sugar, whatever you think it needs. Stick it in the fridge and let chill. Poof! Delicious lemonade. And POOF! A bunch of lemon rinds, which for years went to waste in my kitchen until I learned the error of my ways.

A few years back, my boyfriend and I drove down the coast of California between his home in San Francisco and his school in Santa Barbara. We took our time, stopping to see friends, going camping, and spending a few days in a great B&B in Monteray. The proprietress there had a big, 10 gallon container of homemade limoncello for guests to drink at their leasure, which she was constantly making new batches of because it was so popular. This stuff was fantastic. We couldn't get enough, and finally begged how she made it.

She didn't really have a recipe, she said, because limoncello was so simple. Mix lemons and vodka, let it sit, then add sugar and water to taste and let it sit some more. The hardest part was peeling the 50 lemons or so that went into each huge batch. So, naturally, upon returning home, I made a decision. Every time I make lemonade, I immediately peel the lemons into a little bag which I stick in my freezer. It's not so bad just doing a small batch of 5 or so lemons at a time. Not only does this give me an excuse to make more lemonade than ever, but I also get a great new alcoholic treat which is great to drink straight, with seltzer, or over vanilla ice cream. And yet, it still isn't quite as good as the stuff we had there.... I'm still experimenting, though!


One summer's worth of lemonade gives me more than enough peels to make limoncello for me AND for Christmas presents to various friends. If I had to guess, I'd say 10-12 lemons or so (or 2 batches of lemonade) are probably enough for one batch of limoncello. You want to be sure to peel the lemons such that you don't get a lot of the white stuff (the pith) on the peel - you just want the outer yellow part. Its fine if a little gets in, but if too much does you'll get a bitter taste to your drink.


My initial recipe I got from the excellent blog, Limoncello Quest, where I fully recommend you going to for advice when you make your own limoncello. Now, since then, I've been experimenting with proportions. At the moment, I'm leaning towards:

1) in process: vodka/lemon mix
2) finished: pure white sugar limoncello
3) finished: brown sugar mix limoncello
Limoncello:
one 750 mL bottle of vodka
~1 heaping cup of lemon peels - probably more like 1 1/4
3 cups water
1 1/4 cups white sugar

The process is very simple: put lemons peels into the vodka. (Note that you need a larger bottle than the one the vodka came in, since the lemons clearly add a volume. Not to mention it's hard to get lemon peels in and out of narrow bottle necks, which you'll need to do. I use the one-liter glass bottles from miscellaneous juices.) Let sit for 30-45 days, the longer the better. After that time, heat your water to boiling, and add the sugar, stirring so it dissolves. Let cool, then stir in the vodka/lemon peel mixture. Pour this mix back into bottles (now you will now need more wide-necked bottles, since you've added the extra volume from sugar water!) and let sit another 30-45 days. If you want to cut the time short, I'd cut the FIRST sitting time a little, not the second, since that second rest period really smooths out the taste. Finally, filter the lemon peels and particulates out of the mix by pouring it through cheesecloth or other filters. Bottle, then drink to your liver's content! If you really want to go nuts, you can take the vodka/sugar soaked lemon peels, sprinkle some sugar on them, and munch on them for a tart snack. Or dip them in chocolate and eat them that way... I've done both, and both are tasty, but honestly, most of the lemon peels at this point end up in the bin.

After staining out the lemon peels, I set up a
cheesecloth/funnel filtration system, putting
one cup of limoncello through the cloth
at a time.
Now, I currently have 3 batches of Limoncello: One is still in progress, a lemon/vodka mix that has been sitting for almost 2 months (I've been busy, and need to do the second part soon); one that I've just completed processing; and one that I finished months ago (but that is being depleted fast...).

The brownish, cloudy limoncello is what happens if you realize you are almost of white sugar, and decide to play with the flavoring by using brown sugar rather then going out to the store at 11:30 at night. For this batch, I used a cup of white sugar and 1/3 cup of brown (in 3 cups of water). The sample that I tasted was just as good as the white sugar limoncello, with an interesting, caramel-y undertone. Quite delicious. But I'm not as enthused about giving it away for Christmas - it's just not as nice looking as the pure white sugar one. I may actually run it through some fine coffee filters to see if it helps the look of the drink - cheesecloth just didn't quite cut it, even if it got the big particulates out. We shall see.

By far the most difference comes from playing with the sugar water mix. I tend to prefer a little tarter, which goes well on vanilla ice cream, but the sweeter stuff has its place as a dessert aparatif. It's really a matter of taste, and therefore that is my suggestion: TASTE TASTE TASTE your limoncello as you slowly add in the sugar water, until you are happy with it. THEN bottle and let it rest again. Of course, by varying the amount of water you use, you also choose how diluted your vodka is going to be, and thus how strong your final batch will be, so you can play with that as well.

So, if I add some sugar water to the last bottle of limoncello over the weekend, it should be fine to give away for Christmas. And if I filter the brown sugar mix again through coffee filters, that should ALSO make fine Christmas presents - with enough left over to last me until the next batch! A very good use of leftover lemon peels that would otherwise go into the trash, don't you think?