Every time I visit Benson, or he visits me, we usually take one day for a large, ambitious cooking project. On this most recent visit, we discovered that Fresh Direct (a grocery delivery service I occasionally use in NYC) will actually deliver live lobsters to your doorstep, in addition to whatever else you can buy. And they were on sale. And I had a free delivery coupon. With these facts in mind, we decided to embark on our first ever lobster project, and ordered two lobsters, who, sure enough, arrived alive and well on delivery. They didn't arrive in a tank of water or anything - I was actually surprised that they arrived wrapped up in the usual paper and plastic wrappings that things like salmon filets also arrive in. (Their claws WERE rubber-banded, however). But I guess lobsters are pretty sturdy. We proceeded to name them "Butch" and "Sundance," and sentenced them to a terrible and delicious fate.
 |
| Butch |
 |
| Sundance |
Since we were actually going to kill the lobsters ourselves, we wanted to make sure they were going to a worthy cause. So once again, we pulled out "The French Laundry Cookbook" for advice and recipes. For this meal, we chose TWO lobster recipes: one for the meat itself (butter poached lobster with leeks, pommes maxime, and beet essence), and another one for the bodies (creamy lobster broth). In addition, we made roast pears with a pear-butterscotch sauce from James Pattersons' wonderful 'Sauces' cookbook, for dessert (note: not seen in this blog post - this is my LOBSTER entry, and it's long enough as it is). This was truly an ALL DAY project, but one well worth it. The first recipe, the one with the lobster meat, was definitely the most complicated, and has several different components. You COULD eliminate some components to simplify, but it's pretty darn delicious all together, so I'd highly recommend trying it all together if you have the time. But read the full recipe first, because you can do a lot of the steps simultaneously, while various components are in the oven, or cooking down, or whatever.
 |
| The amazing finished product |
Butter Poached Lobster with Leeks, Pommes Maxime, and Beet Essence
2 or 3 lobsters
1 large yukon gold potato
1 lb beets (or 1 cup beet juice)
1 large bunch of leeks (which will turn into 1.5 cups of leek rounds)
2 tbs tomato diamonds
2 tsp chives
1 tbs Brunoise* (*to make, you need leeks, carrots, and a turnip)
3 cups of butter* (*which makes 1/2 cup clarified butter and 2 cups Beurre Monte)
1/2 tsp red wine vinegar
~1/2 cup white vinegar/8 quarts of water
a few drops of lemon juice
kosher salt
 Part 1: The Lobster
. You can do this part early, and leave the lobster meat in the fridge until you are ready to cook it later (though bring it back to room temperature before you cook it). Unlike the traditional boiled lobster, here you don't fully cook the lobster in the shell - you leave it in the hot water only long enough to kill it and for the meat to pull away from the shell for easy removal. So, you need two large containers: one to initially boil the water and one which will hold the lobster and continue to cook it. Since my large pots are rather limited, I actually boiled the water in two separate smaller pots, than cooked the lobsters one at a time in my large pressure cooker pot (the largest pot I own). Fully cover the lobster with cold water in the pot it will be cooked in. Take that water, and put it in the another pot, and add 1/2 cup of white wine vinegar for every 8 quarts of water you used to cover the lobster. Bring this water to a boil. Pour this boiling water over your lobster. This kills the lobster. Now let it seep for 2 minutes (for a 1 1/4 lb lobster; 3 minutes for a 2 lb lobster). Remove the lobster from the hot water, but DON'T discard the water. Twist the claws off of the body and put them back in the hot water for 5 more minutes. During this time, detach the tail and carefully remove the tail meat by twisting off the tail fan thing and pushing the tail up and out (using kitchen shears helps). Cut the tail lengthwise, removing the sand vein. Once the claws are cooked, you remove those from the water as well, twisting off the knuckles. You can get the knuckle meat out as one big chunk of meat if you snip off the very top joint of each knuckle and cut away the shell. Do this. For the claws, you can rock the pincher back and forth, cracking it loose, then remove it straight off the claw, hopefully leaving the meat inside it still attached the the rest of the claw meat (I managed this on the second lobster, but not the first). You remove the rest of the meat from the shell by cracking the shell near the bottom on both sides, and pulling the shell bit off so the meat can come out the bottom. These steps results in a delicious plate of lobster meat, still for the most part uncooked. As for the body, you can pull off the back and remove the lungs, roe and the sack behind the head, and use the rest of the shells and body for soup, later. These can be frozen, or used promptly. You can use the water you boiled the lobster in for a base for your lobster broth, if you are making that as well. We did!
 |
| Delicious Lobster Meat |
 |
| My mandoline |
Part 2: Various vegetable preparation. Beets, potatoes, and leeks all play important parts in this dish, and if you are slicing and dicing one vegetable, you may as well do them all at once. For this, it's extremely useful to have a device called a mandoline (seen right), which can slice vegetables extremely thinly. This not only makes slicing vegetables quicker and easier, but it also results in amazingly thin potato slices, which you really want for this recipe. I've included two pictures below showing HOW THIN we were able to get our potato - laying it out you could literally read through it, and see the inner structures of the potato - it really made me want to break out a microscope! Awesomeness.


So, the next step is to very finely slice your potato, as thin as you can make it. And unless you either a) have beet juice, or b) have a juicer (we had neither), you also want to slice your 1 lb of beets as finely as you can, and then dice it nice and small, so they're easily blendable. While you are at it, take the leek rounds (the white and pale green part of the leek) and slice those as well, into strips (see picture in the leek section), until you have 1.5 cups of them. Finally, prepare the vegetables for your brunoise. What is a brunoise, you ask? Good question, I had no idea either. It's a finely diced mixture of various vegetables - in this case, equal parts carrots, leek greens (the dark green part), and turnips - where all of the components are diced to less than 3 mm - a very fine dice indeed (again, see picture in the leek section). You only need 1 tbs total of the brunoise, but since it freezes well, you can make a full turnips worth and save the rest for later. So I diced up the entire turnip, with equal parts by weight of leek greens and carrots (diced by Benson) to match, and just made a LARGE batch of it, rather than a 1 tbs batch. In addition, you want to neatly slice your tomato into at least 2 tbs of diamonds: peel it, quarter it, remove the core until you just have the outside, which you then slice longwise into strips, then diagonally to make diamond shapes, which are rather pretty! So, that's your chopping - but keep all components separate for now!

Part 3: Pommes Maxime. You have your extremely fine slices of potatoes, so you are ready to make your fancy potato chip (which is kind of what this boils down to). Recall this recipe requires 3 cups of unsalted butter: You will now use about 3/4 cup of it to make 1/2 cup of clarified butter. This is pretty easy: just heat up the butter in a saucepan over low heat without stirring. It will separate. Skim off the top foamy layer of milk solids, leaving you with a clear, yellow butter beneath. That bit is the clarified butter, and it's what you use on the potatoes. Clarified butter can be heated up more without smoking since it doesn't have the milk solids in it. So, to make the pommes, take the potato sheets and dip them in butter, layering them on a silicon lined baking sheet either in one large sheet which you will cut up later, or into large round disks of potato. Sprinkle with salt, and bake in a preheated oven at 300F for 45-50 minutes, until they're brown and crisp. Keep an eye on them though, ours turned out a little toastier than we wanted - edible, but toasty. Mmmmm, toasty.
 |
| Straining the beet juice |
 |
| The finished glaze. |
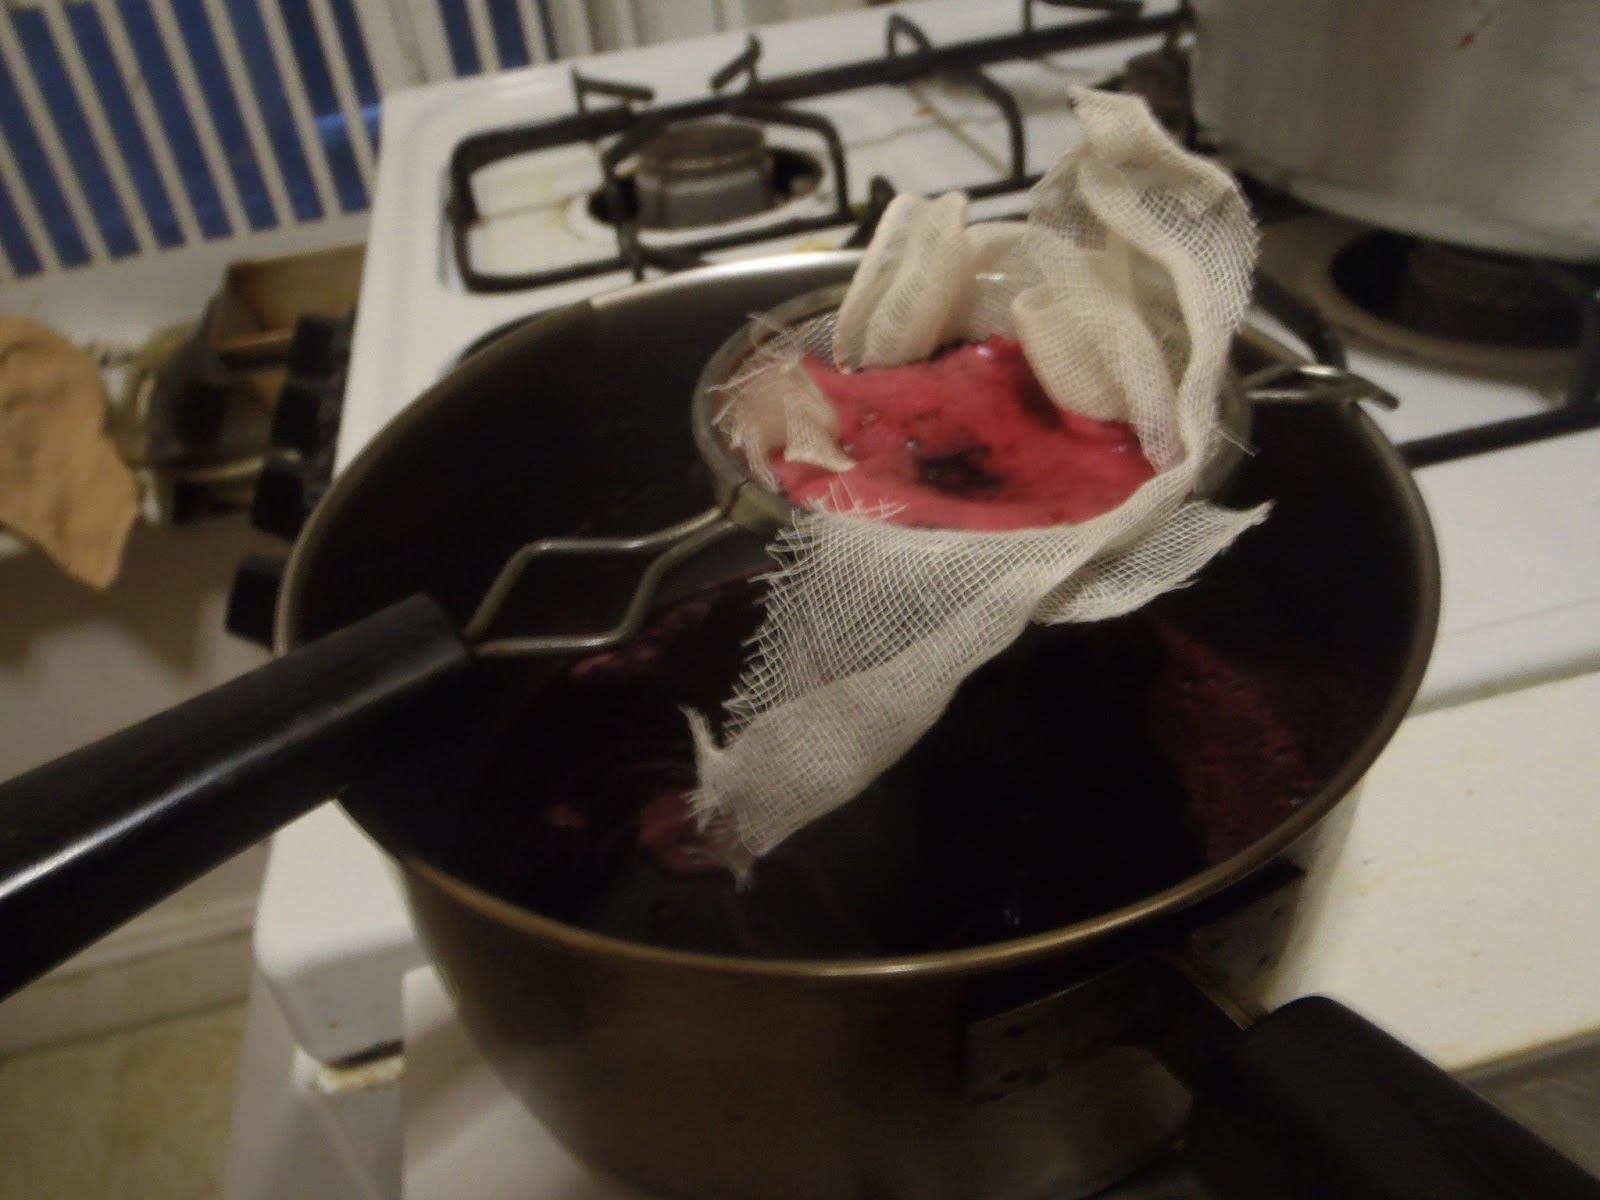
Part 4: Beet Essence. If you have a juicer or beet juice, you can skip this first bit. But if you DON'T, take your one lb of nicely sliced and diced beets and toss them into the blender. Add perhaps 3/4 cup of water and BLEND. Add more water if you can't get it to blend - what you are going for is a generous cup of the strongest beet water you can get. It's OK if it ends up a little extra watery - you'll be reducing this down to about 2-3 tbs, you just want all the beet essence you can get. So blend, blend, blend, then press it through a strainer and get all the liquid out you can. Then strain THAT through cheesecloth and a finer strainer (or a chinoise/tamis, neither of which I have. See my note on straining down in the
Lobster Broth section.) Take this cup of now particulate-free beet juice, and reduce it slowly over low heat to 2-3 tbs of glaze - this will probably take 30-45 minutes, stirring occasionally, and skimming off any skuzz that may rise to the top. Is this worth it? Yes. Aside from the lobster itself, the beet essence turned into my favorite part of this dish, and if I had a juicer would happily make this beet juice on a regular basis for use in other dishes. Plate-licking good. There is one more step to finish this glaze, but that comes right before serving it.
 |
| Blanched leeks |
Part 5: Leek mixture. You have all your veggie components sliced and diced at this point, and you are going to blanch each vegetable individually (leeks, carrots, turnip, and leek greens) until each part is soft. To blanch, boil some salted water, and prepare an ice bath (aka ice water). Taking each vegetable in turn (already sliced and/or diced), put the vegetable into the water until it is soft, but not mushy. You want them to be cooked, but still firm and full of color. Then immediately take the vegetable out with a strainer and drop it into the ice water until it is cool - this not only stops the veggie from cooking further, but helps it keep its nice color. I sometimes make string bean salad using this method.
 |
| Finished Brunoise |
The leeks you should boil for a minute or two; for the diced veggies it shouldn't even take this long. Taste test them to be sure! Then once they've been iced, put them out on a paper towel and pat them dry(ish). Keep the leeks separate for now, but once the brunoise veggies are cooked, you can mix them up together into one big veggie mix. You can now mix the leeks with 1 tbs of the brunoise, the tomato diamonds, and 2 tsp of chives in a small saucepan. But before we can finish this part, we need to talk about butter.
 |
| BUTTER!!!! |
Part 6: Butter. So now everything is almost ready to go: you just need to finish each of the components. To do this, you need BUTTER, or more specifically, Buerre Monte. So, I was amazed at this step, honestly, it was really cool and pretty simple to do. What you are doing is melting your butter in such a way that instead of separating out into the clear parts and the foamy parts, you end up with a thick butter liquid that still looks all creamy and buttery (see below). It's suprisingly easy, you just need a very little bit of water (about 1 tbs) and your butter. You need 2 cups of unsalted butter, cut into tbs chunks. In a medium saucepan, boil your 1 tbs of water, and ready your whisk.
 |
| finished buerre Monte |
Reduce the heat to low, and start adding the chunks of butter bit by bit, whisking vigorously as you do so, as you emulsify your butter into the water. Once the process has started, you can just keep adding butter until you have the amount you need (in this case, about 2 cups) - you just need that 1 tbs to start. Keep the level of heat gentle and consistant, and keep whisking. You need to do this step
right before you need to use the buerre monte, and keep it in a warm place until you do so, so that it doesn't break and keeps emulsified.
Part 7: Finishing Touches. Now that you have your buerre monte, you are ready for the finishing touches.
Beet essence: bring the beet glaze to a simmer, then whisk in 3 tbs beurre monte, 1/2 tsp red wine vinegar, and a few drops of lemon juice to taste.
Leeks: heat the leeks, tomatos, chives, and brunoise with 1/4 cup plus 1 tbs of beurre monte until warm, then season with salt and white pepper.
Pomme Maxim: make sure they're in the desired shape, and reheat briefly in the oven until warm, 2-3 minutes at 300F.
Lobster: The lobster should be at room temperature - place them in a wide saucepan and pour buerre monte over them to cover (about 1.5 cups, or the rest of the beurre monte). Put the saucepan over low heat and poach the lobster in the butter for 5 to 6 minutes, enough to heat through. The lobster will be cooked at this point, but it's cooked at such a low heat that the meat stays as soft and as tender as if it were raw. And once this is done, the poaching liquid (aka beurre monte) will have a nice sweet lobster flavor, which is completely reusable and amazing on toast, popcorn, and wherever else you might want to use butter. I have been happily using these leftovers!
Presentation: On a small plate, put a spoonful of beet essence in the center. On this, place a generous tablespoon of the leek mixture. On this, artistically lay half a lobster tail, a claw, and the meat of one knuckle (aka, a quarter of a lobster). On top of THIS, place your pomme maxime chip at a jaunty angle. Enjoy!!!!
 |
| Finished dish, sans potato disk. |
While our presentation was probably not as nice as it would be at the French Laundry restaurant itself, I thought that on the whole they turned out looking pretty good. But not as good as they tasted. Even if I don't do the whole rigamarole again, I will very happily poach my lobster in butter in the future, as that part was pretty easy (it was the rest of the preparations that took so much time!). The beet essence, again, was another amazing component I would also be happy to make on its own. The chip on top was tasty and crunchy, and pretty straight forward with the mandoline. And now that I have brunoise in the freezer, I'd eat the leeks again, too, but of the various parts, it was probably the least exciting and took the most work (all that dicing... I really need to remember to grab the food processor that is currently sitting in my parents basement for me).
As each lobster made 2 dishes worth, Benson and I were each able to have seconds, so that we had our whole lobster to ourselves. We probably could have eaten thirds if we'd made a third lobster to split! A complex dish, but truly, truly delicious.
 |
| Searing the lobster shells/bodies |
The
creamy lobster broth,
by contrast, was delicious AND simple to make, though we didn't finish it until the day after we had our lobster meal (we worked on the soup, but fridged the broth over night). We already had all the shells, legs, bodies, and whatnot from the lobster ready to go (remembering to remove all lungs, roe, and other stuff inside), leftover from the previous feast. So all we really had to do was roast the shells briefly in a pan (to make sure they were nice and red), then toss them in a pot with water and various extra ingredients and keep reducing the broth. The recipe called for 3 lobster bodies, but we had 2, so we just cut down the liquids by a third and kept the rest basically the same. The results were AMAZINGLY delicious, but also extremely rich. We got two small bowls of broth out of this... and neither Benson nor I could finish our bowls completely. It was simply... too rich, too much flavor, and our tastebuds simply got fatigued eating too much of it at a time. So we saved the second half of it for the next day and enjoyed it all over again. So if you make this, keep it mind it's definitely best in small portions - if I made it for a group I'd probably make about a shot glass per person - that would be enough to leave you wanting more, but not overwhelm you. (Incidentally, that seems to be the philosophy in general of food from the French Laundry - give you lots of small servings of amazing food, and leave you wanting more. In the case of the lobster itself, we were happy to eat more anyway, since we had it. In the case of the broth, a little bit went a LONG way). Anyway, here is the recipe for the broth - a definite must if you ever have lobster bodies and shells lying around - I'll definitely be making it again!
 |
| The amazing, rich, frothy, finished broth |
Creamy Lobster Broth
1/4 cup canola oil
3 lobster bodies (we used 2)
1.5 cups chopped tomatos
1/2 cup chopped carrots
1 bunch tarragon (1/2 oz)
1 cups heavy cream (we used 2/3 cups)
 |
| Making the Soup base |
Take your lobster bodies and sear them with the oil over medium to high heat for a couple minutes, until they are well and truly red. Toss them in a pot, add the tomatos, carrots, and tarragon, and cover everything with water (you don't need to add salt). Bring to a boil, then let simmer for an hour - if any skuzz or impurities rise to the top, you can skim those off. This process doesn't require much attention. Once you've done this, strain the stock into another pot, smashing the lobster bodies to make sure all the liquid comes out.
 |
| Stock |
You want to really strain the soup here and make sure there is no lobster shells, impurities, or little particulates. One of the things that Benson and I have learned from
The French Laundry Cookbook is that straining your soups, sauces, and liquids increases the quality of your finished dish a LOT more than you might expect. There is even a page long entry in the cookbook titled "
When in Doubt, Strain" - apparently the restaurant routinely puts sauces and stocks through an increasingly fine series of strainers 4 or 5 times before anything hits the table. So we ran the entirety of the broth through a tea strainer and cheese cloth, because we don't have a fine mesh chinois or tamis (a note to any readers looking for present ideas!). We have strainers larger than the tea one, but they're not nearly as fine, so we used those first, then moved on to the tea one. This took a while, but we have learned from past experience that it is worth it, so STRAIN your soup!
 |
| Adding cream |
Next, take your now-particulate-free liquid and put it in a pot. You will now reduce this liquid (which is probably about a gallon of stock which doesn't taste particularly flavorful) to 2 cups (1.5 for us, since we started with fewer lobster bodies) - this takes a while, but again doesn't require much attention. At that point, the flavor is extremely concentrated, and, after straining it once more, we add one cup (2/3 cups for two lobster) of cream! Are we done? Of course not! Reduce this sucker down until it is once again 2 (1.5) cups of concentrated lobster goodness. This time you DO need to pay attention, because cream and heat can equal burning, so stir.
At this point, you take the broth, strain it one more time, just for fun, and put it in the refrigerator for several hours, to chill (or up to three days, according to the book). You want to do this so the flavor melds nicely - we left it overnight and that worked fine. Once you are ready to eat it, you put the cold broth into a saucepan and heat it on medium, whisking vigorously as you do so. You want it to froth up significantly, it seemed like it practically doubled in volume (though I didn't do a strict measurement of that). So once it's hot and frothy, you can serve it. In small, delicious portions. It is truly a delicious and surprisingly easy soup (and would have been easier if we had a LARGE fine mesh strainer, rather than a tiny tea strainer).
 |
| Soooooo goooooooood. |
So the lobster resulted in two amazing meals - three, if you count the second lunch we had soup for. And I would definitely order live lobster again - while we did do a more complicated version of lobster, I'd be more than willing to try just doing a straight up boiled lobster, as well, if they were for a reasonable price and I didn't want to go too complicated. But I'd also very happily butter poach it again, since, if you ignore the extra veggies and sauces, that in of itself is amazing (and leaves you with leftover lobster butter - amazing on toast!). And when I do get lobster again, I will never ever throw out the shells. Even if I don't have time, I could just freeze them and make the broth some other time. Totally worth it!